|
|
 |
- Fresh-Faced
CGI MAGAZINE - July 2002 |

|
|
|
 |
Since setting up shop in discreet’s hometown of Montreal, new
kids on the block Di-O-Matic have built up a bit of a reputation
for building quality 3ds max plug-ins, and their newest release
is their best yet.
|
|
One of discreet’s newest Montreal neighbours, Di-O-Matic is also
a fresh face on the 3ds max developer scene. Despite being a
relative newcomer, the quality of its max plug-ins thus far
should ensure that it is already welcome in both communities.
|
|
Its first two plug-ins, Morph-O-Matic and Cluster-O-Matic, both
brought to max powerful tools that are particularly suited to
facial animation. With the first of these products providing
progressive morphing and the second equipping max with a tool
for animating different complex selections, the fact that
Di-O-Matic’s newest product again concerns the facial form.
|
|
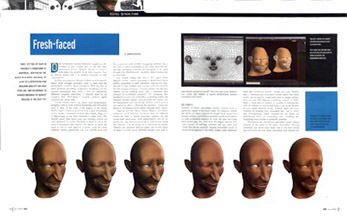
Facial Studio builds on these core technologies, bringing a
whole suite of facial modelling and animation tools to max. At
the heart of the plug-in is the Facial Studio object, which is
accessed from a new drop-down in the Create > Geometry section.
One simply drags out a default head in the front viewport to
begin with. The Modify panel then shows just two rollouts, which
are used primarily to control the level of detail that the head
is displayed and created using. The option to create the head at
low-res and high-res is given, with the more detailed version
generating just over 10,000 faces and the low-res just under
8,000. Swapping between these two levels of detail is possible
at any time. Both the low and high resolution versions are
designed to be used alongside the MeshSmooth modifier, which
works just as you’d hope.
|
|
Also located within this area is the Apply Head Materials
button, which generates a Multi/Sub-Object material consisting
of eight materials, one for the face, two each for the eyeballs
and corneas, and one each for the teeth, tongue and gums.
Stepping down into the face material reveals nothing more than a
standard skin coloured Blinn-shaded material, but changing this
shader will reveal a new subsurface scattering model: the
Hanrahan-Krueger shader. This provides two layers, one for the
epidermis and one for the dermis, which gives a nice scattering
effect, softening the shadows, where the red tint of the dermis
colour shows through most clearly.
|
|
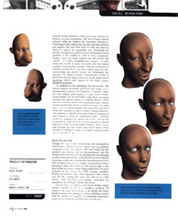
Stepping into the Facial Studio object’s sub-object mode and
you’ll discover no less than sixteen different, the first of
which provides controls for the overall head generation, with
slider-based controls for gender, race, age, fatness and so on,
as well as how much the character is to be styled as a
caricature or anime. There are also spinners that can adjust the
overall shape of the face towards seven different shapes, from
pear to egg-shaped, square to round. You can save your head at
any point, and there’s a handy Hold/Fetch button available at
all times.
|
|
Several of these sub-object
levels control how a particular aspect of the head looks: for
instance, within Ear mode you have controls for length (both
upper and lower), rotation, and relative position on the head
object, as well as detailed controls for how the tops fold over,
how pointy they are, even how the tragus appears (the
little mound of cartilage between the ear canal and cheek that
can be pierced). Similar incredible levels of detail can be
applied to the teeth, tongue, chin, forehead, neck, jaw,
eyebrows, mouth, cheeks and eyes. There’s also a Deformations
sub-object mode where the head model can be tapered, scaled and
made to bulge. Indeed, there are over 500 different modelling
controls, so Di-O-Matic’s claim that its product is capable of
creating any style of realistic or caricatured head is not as
far fetched as you might initially think. Indeed, there’s even
controls for making your characters ape, cat or wolflike.
Furthermore, these controls are all based on MAXScript files, so
extending and tweaking the modelling tools further is perfectly
possible.
|
|
This leaves just one further
sub-object mode, whose purpose is the same as its name:
Animation. Having modelled and saved your head, this is the area
where you would build up your facial animation, and despite the
controls being contained within just three rollouts; its
abilities are quite remarkable. The first of these rollouts
contains what are dubbed the Animation Deformers. These begin
with controls for the chin and how defined and angular the area
that links it with the neck is. There’s a control for expanding
and contracting the nostrils, changing the pupil size and
altering the vertical position of the eyelids as well as their
contraction. Finally, there’s three controls for the mouth that
control in a quite straightforward manner to what extent the
mouth is open, its width, and the vertical position of the
mouth’s corners. Adjacent to this area is a button marked Build
Lip Sync, which does just this, constructing the mouth shapes
for subsequent lipsyncing. The plug-in actually builds
automatically fifteen phonemes (the key shapes that your mouth
makes whilst speaking) which then appear in the final rollout,
labelled Generators.
|
|
In addition to the phonemes for
lipsyncing, this section features six further generators that
enable you to automatically produce the emotions of sadness,
anger, joy, fear, disgust and surprise in your head. Further
morph targets can be developed using these animation controls
and can be added to a custom section, where they are used like
all the aforementioned ones, using a simple spinner that can be
set between 0 and 1 in some cases, -1 to 1 in others. Finally,
this animation sub-object mode also contains a rollout dubbed
Pseudo-Muscles. This appears to require some knowledge of
anatomy as each control is given its anatomical name – risorius,
quadratus, zygomaticus, nasalis and so on – but all that is
required is a few minutes of experimentation playing with each
of the sixteen facial muscle controls. These names then become
far less cryptic and you’ll know which spinners to change to
make your head’s temples pulse, top lip curl and so on.
|
|
Though
the copy of the software that was provided for review was a late
beta version, there were no problems whatsoever with the
plug-in. The only thing that the product was lacking was its
documentation and the library of fifty maps that will are
bundled with the shipping product. Experimentation with textures
revealed that the mapping coordinates produced by the software
are clean and shouldn’t require any further manipulation before
painting (a map that’s twice as wide as it is high works best
for the face map), either using a third-party 3D paint program
or just using the UVW Unwrap modifier. Finally, the software
adds a new map type to max, which acts
like the existing Mix map, but with up to 1,000 layers, with
blending and mixing controlled by operations like multiply,
darken and so on.
|
|
Overall then, it’s hard to fault Facial Studio, which actually
delivers on all of its ambitious promises. Of course, it can
never be all things to all people, but Facial Studio’s
unrestrictive approach to head modelling coupled with the
quantity and quality of animatable parameters makes for an
extremely powerful and versatile tool.
|
| |
|
Written by Darren Brooker,
CGI Magazine, July 2002 Issue |
|
|
|
|