|
A realistic
human head is one of the toughest things to realize in a 3D
environment. If you have to create a realistic head from scratch
it often already takes a while to set up a good basis and then
it can take hours to carefully add and tweak the details until
you're satisfied. When the deadline monster is breathing in
your neck you often simply don't have the time to perform all
that's necessary to model a realistic head. Next to this it
takes another heap of time to prepare the face for animation
purposes. The muscular setup of the model must have a suitable
flow in order to properly animate the jaw, mouth, cheeks, eyes,
eyebrows, etcetera. On top of this, if the character has to
speak, then you'll have to spend another round of time preparing
morph targets for the different vowels and their corresponding
facial expressions. All in all it can become quite a nightmare,
especially if the head is only a part of a complete body you
have to animate as well. The cold sweat almost appears on my
forehead while I write this.
PARAMETERS GALORE
The relatively young 3ds Max plug-in development company Di-O-Matic
has created a very interesting plug-in to ease and automate
creation and animation of a human head. The plug-in seamlessly
blends into your 3ds Max arsenal and adds a "Facial Studio"
category to the dropdown menu of the Max Create panel. Once
you have selected the category and pressed the corresponding
Facial Studio button you're ready to create a default head in
a desired viewport. Just drag the Facial Studio object until
it's got the size you want and there's your head! Well, at least
it gives you a very good head-start.
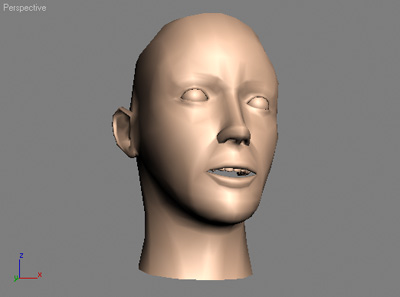
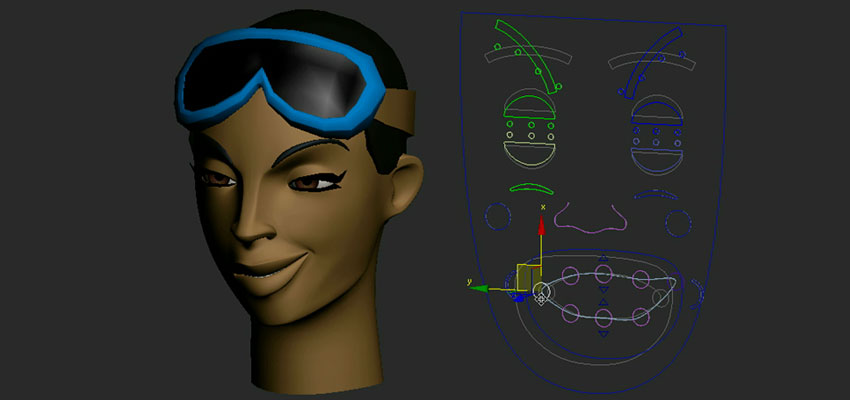
The standard head is not exactly your average
handsome human being, but it's up to you to turn it into any
babe, hunk, geek or creep you like. To realize this, Facial
Studio offers a very impressive array of parametric controls
to adjust just about anything you'll ever want to change in
the appearance of the head. You can now become a plastic surgeon
and adjust that nose, inflate those lips, remove that double
chin and turn that head into your favorite movie star or music
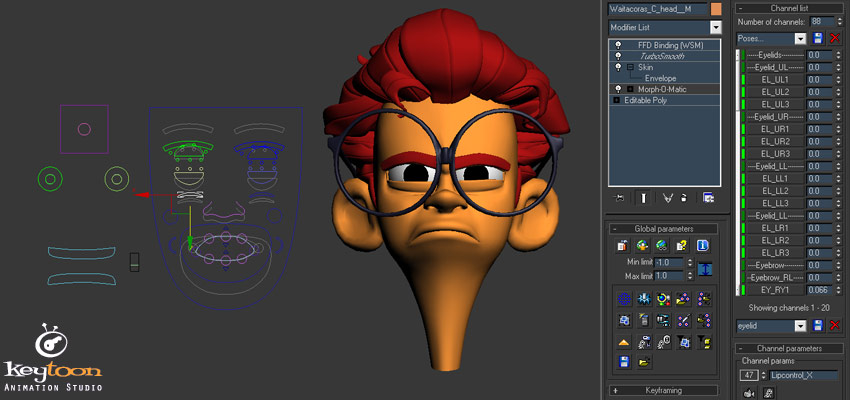
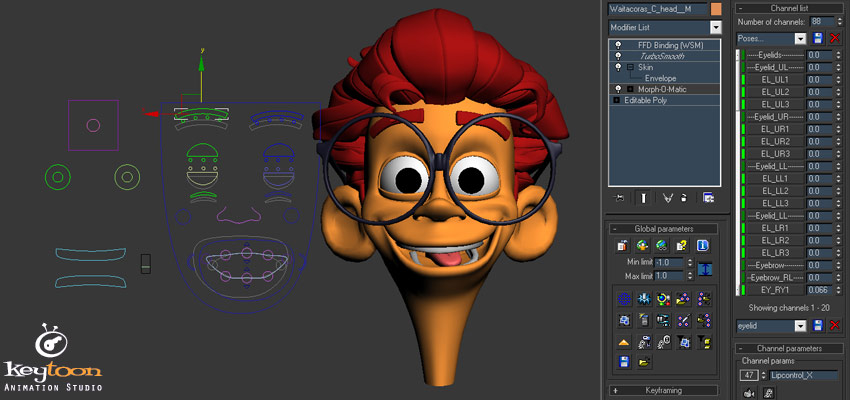
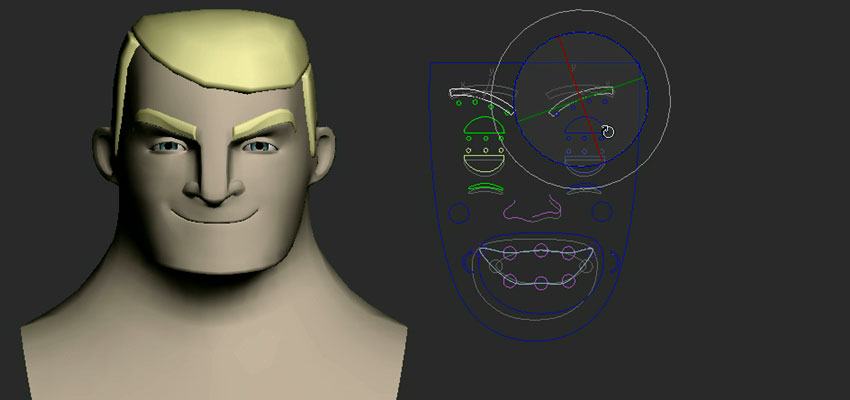
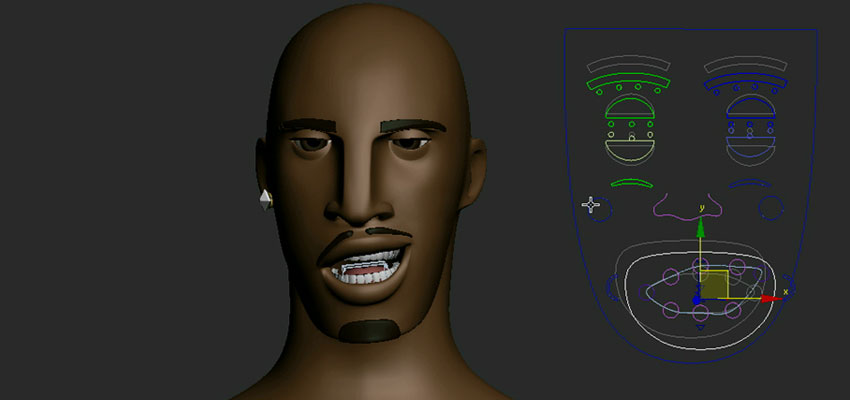
idol. The parameters are accessible from a list of sub-object
modes in the Modify panel. The sub-object modes include all
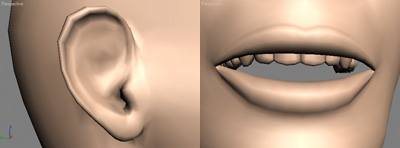
the available elements of the head, like ears, teeth, nose,
tongue, chin and more. Each of the sub-object modes offers its
own list of parametrically adjustable values. For example, the
mouth sub-object offers separate values for the shape, angle
and size of the upper and lower lip. The various adjustable
properties of each head detail are very extensive. On top of
the detail adjustments there are also presets for things like
ethnicity and age. For example, create an Asian man or woman
with the touch of a spinner. Other essential elements of the
head -such as teeth and tongue- as well as the right Material
ID assignments are part of the deal, so you're ready to roll.
If you're not satisfied with the default head's amount of detail,
then you can choose from three different resolutions for the
head. For close-ups a Meshsmooth modifier on top of the head
object can be advisable though.
Facial Studio's head mesh was carefully modeled
by a team of 3D artists and is a useful general purpose basis
for your own facial creations. There are only a few weak spots
in the mesh that could use a little improvement in a future
update, in order to completely get rid of the few Facial Studio
characteristics that can be a bit difficult to conceal. The
contour and internal shapes of the ear could be a bit more detailed
and pronounced and the sides of the mouth could use a bit more
relaxed, natural flow. Apart from these few minor structural
details just about any facial characteristic can be adjusted
to your liking by experimenting with Facial Studio's many different
deformation values.
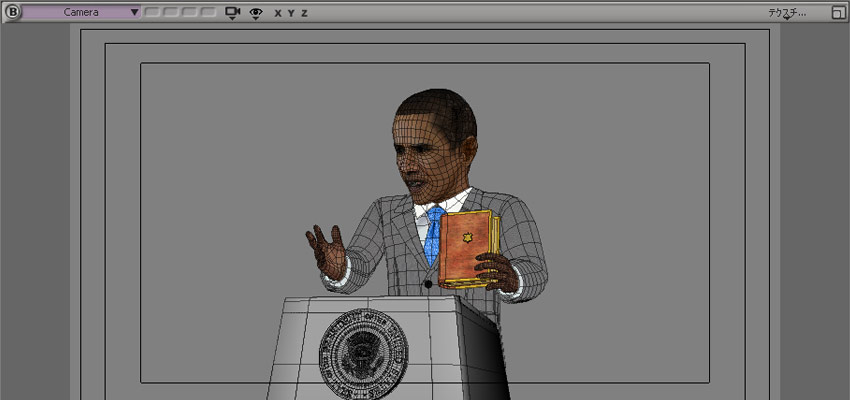
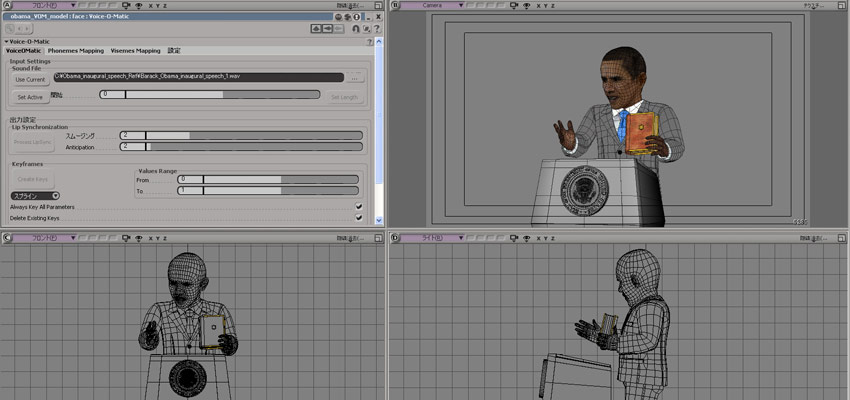
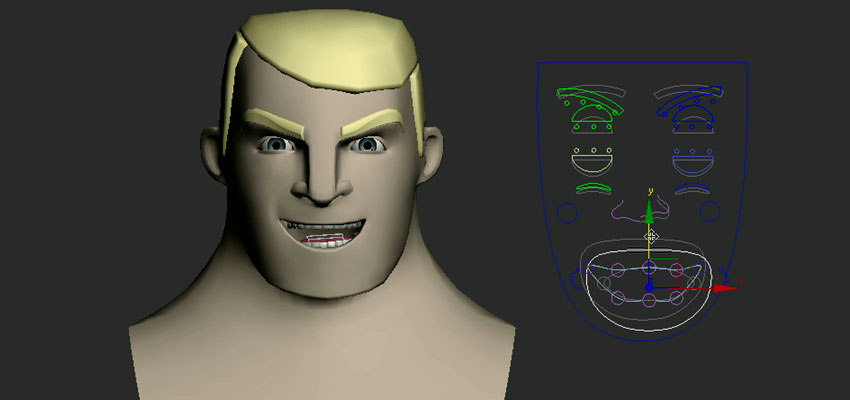
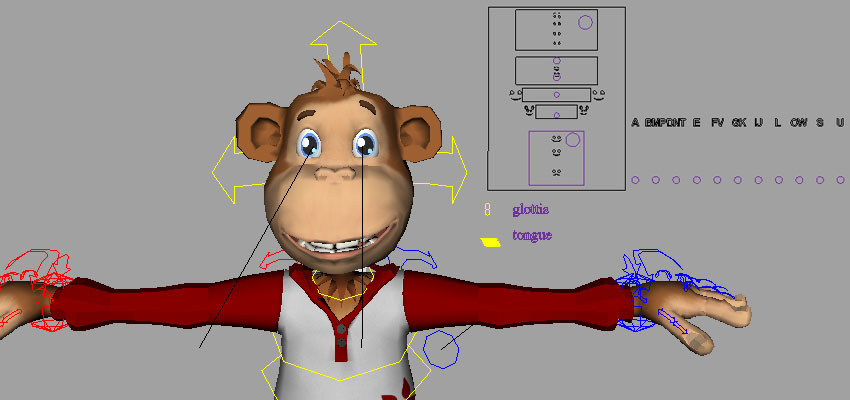
TALKING HEAD
Facial Studio offers a lot of value. For instance it also allows
you to animate a talking head by simply animating values for
each type of phoneme and its corresponding mouth shape. I managed
to animate the head saying my name in a matter of minutes! The
animation controls for making the head talk can in the new version
1.5 easily be linked to Di-O-Matic's powerful speech animation
automation plug-in Voice-O-Matic, making it a snap to animate
the head pronouncing your recorded speech. The list of features
goes on and on. Even the major facial muscles like the Levator
Labii Superioris and the Orbicularis Oris have their own values
and can be animated separately. Facial Studio's virtual playground
is impressively extensive. The facial laboratory also extends
into the Max material editor. Facial Studio comes with a dedicated
diffuse light scattering skin shader developed by Pat Hanrahan
and Wolfgang Krueger. The difference between using a simple
Blinn shader and utilizing the multi-layered Hanrahan-Krueger
shader can prove the difference between an artificially looking
surface and the appearance of realistic skin tissue with subtle,
delicate highlights. Next to the skin shader Facial Studio comes
with a powerful Multi Mix Map that enables advanced map compositing
with blend modes like lighten, darken and multiply. The Multi
Mix Map can be used to blend together one of the many prepared
facial texture maps that also come with the package.
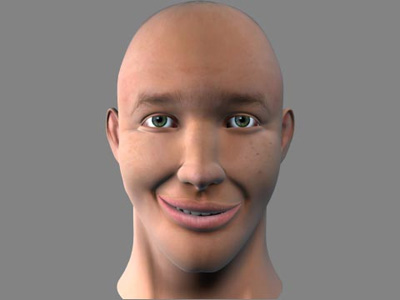
A render using the shipping texture maps and utilizing
the Hanrahan-Krueger shader for advanced skin surface characteristics.
But what if you'd like the Facial Studio head
to be a seamless part of a human body, without losing all the
parametric functionality? Well, in that case you simply add
an Edit Mesh modifier on top of the Facial Studio head object,
use that to attach your body mesh to the head and weld the necessary
vertices to make it one seamless result. As long as you don't
change the topology below the Edit Mesh modifier -for example
the polygonal detail level of the Facial Studio head-, you can
keep using all parametric values of the head object while it's
attached to the body mesh. If Di-O-Matic could one day offer
a complete parametric human body with all its parts, adjustable
shapes and animatable poses, the need for a complicated custom
bones rig and a tweaked mesh deformation setup in order to animate
a human character could become history. Like Facial Studio and
Voice-O-Matic have been brought closer together, 'Body Studio'
and Di-O-Matic's Hercules muscular deformation system plug-in
could be blended together as well, to form a very powerful plug-in
to parametrically create and animate humanoid characters.
But back to the here and now. So what's new
in Facial Studio version 1.5? Well, a new low resolution head
is added and set as the default head. The low resolution is
very convenient for realtime applications and can always be
refined if necessary by adding a Meshsmooth modifier or choosing
a more detailed head structure from the Facial Studio object
itself -if there's no topology-dependent modifier in the stack-.
A new track has been added to the phonemes that allows the mouth
to be forced to a closed position. A new option has been added
to always key all tracks, so pose to pose animation has become
easier. As mentioned before, there's a better integration of
Voice-O-Matic, the UVW coordinates of the medium and high resolution
head have been improved, and there are some more enhancements.
Reviewing all facets of Facial Studio goes beyond the scope
of this review, but the plug-in offers a very comprehensive
amount of ingredients to experiment with and can save you a
considerable amount of time when it comes to creating and animating
3D heads within good ol' 3ds Max. It will be no waste of time
to download the Facial Studio trial version from the
Di-O-Matic
website and have a go at it.
Metin Seven
www.metinseven.com
www.sevensheaven.nl
|